
Beautiful. Just beau!
What you will need are: balloons, glue, yarn, tray for glue, corn starch 1/2 cup of Corn starch, 1/4 cup of Warm water, clear fast drying spray paint, hanging lamp cord or fishing line (depending on your desired final product), and a lighting kit if you’re looking for a fully functional lantern. Jessica recommends using a sharpie to mark on the inflated balloon how much room you need to leave for the lighting cord. She also recommends coating the balloon with vaseline prior to wrapping the yarn coated with glue so it doesn’t stick on the balloon once it’s dry. You can see all the details on Jessica’s blog.

Instructions:
1. Inflate the balloon to a medium size so the shape is a little rounder.
2. If you’re looking to make a lampshade out of the string chandelier, use a sharpie to mark around the knot on the balloon.
3. Before you start working, we recommend using a tarp.Mix corn starch, glue and warm water together until it has a smooth texture.
5. Smear the vaseline all over your balloon until it is completely coated so th twine wet with glue won’t stick on the balloon after dry.
6. You can start a little assembly line with friends by one of you feeding the yarn through the glue mix and giving to another person to wrap it around the balloon.
7. Start wrapping the balloon vertically, slowly changing to wrapping. For a seamless look, tuck the ends of the twine under one of the wrapped strings.
8. Wait 24 hours until the balloon has completely dried before popping the balloon.
9. Spray the string chandeliers with clear fast drying spray paint et voila!

I imagine this beauty was made the same, using doilies rather than yarn, but it is delicious. Cannot wait to make one!
DIY Tin Lanterns
These are just scrumptious and will provide me with the right amount of light to get people moving around a dark field without falling over.

What to do: Peel the label off an old tin can, fill with water and freeze in the freezer. Once frozen, draw a design onto the tin, and then pierce holes around the lines of your design using a nail and hammer.

Beautiful!
Idea sourced from Trinket Box, who originally found the idea from Gem Fatale’s Style Blog.
Idea sourced from Trinket Box, who originally found the idea from Gem Fatale’s Style Blog.
Candles in jars? Candles in jars! Simplicity is sometimes best. The sand in the base is effective


And these are pretty spectacular...

Bright coloured glow in the dark jars to line a walkway or use as decoration. Thank you www.intimateweddings.com THEY DO ONLY LAST ABOUT 2 HOURS THOUGH and make sure you use gloves as the cracking noise inside is glass. You can use glow in the dark paints if you prefer.

DIY Glow Jars Tutorial
For each glow jar you will need:
- a jar
- two Glow Sticks
- scissors
- rubber gloves
- safety glasses
Disclaimer: This is a project meant to be done by an adult – not a child!
Purchase Glow Sticks (I got a pack of 15 for $1.50) and dig a jar out of your cupboard.

Grab two glow sticks and cut at one end. Make sure they are inside the jar when you cut them. I used rubber gloves because I didn’t want to get the glowing liquid on my hands.


Shake each glow stick while holding inside jar until contents are empty. You will notice little pieces of what looks like plastic along with the liquid. One reader said this is actually glass, so be careful. You will dump these out later.


Head to your garbage and dump out the little pieces of plastic. Swirl liquid around the jar.
 That’s it. You’re done! Go and find a dark place and enjoy the glow! (Note: These will glow for about an hour.)


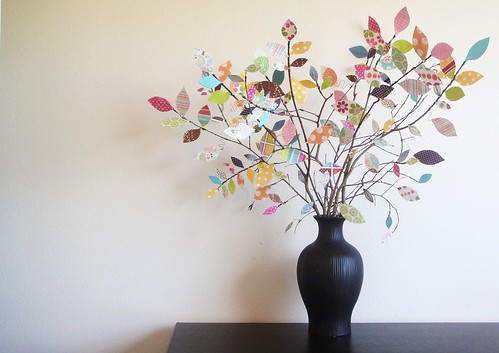
With a big focus on nature and recycling, this is a lovely idea...
A great idea as a gift for your guests...

And hark at this simple way to contain a cake without too much fussy decoration... clever!

Phew.... that's a few hours of trailing the internet for ideas. I hope you can enjoy them too.
Love and light
Love and light
xxxx
Pretty little things :)
ReplyDelete